
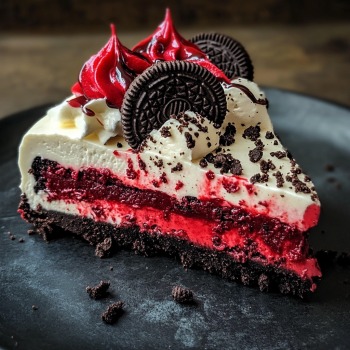
Velvet and Oreo Cake is the ultimate indulgence for dessert lovers. This luxurious cake combines the moist richness of classic red velvet with the irresistible crunch and creaminess of Oreos. The layers of velvety cake are filled and topped with a decadent Oreo-infused frosting, making it a show-stopping centerpiece for any celebration. Perfect for birthdays, holidays, or simply as a sweet treat to spoil yourself, this recipe is a surefire way to impress. Whether you’re a fan of red velvet or a cookie connoisseur, this dessert brings together the best of both worlds. Let’s dive into this easy-to-follow recipe to create a cake that’s as delicious as it is stunning.
2. Ingredients
For the Velvet Cake:
- 2 1/2 cups (320g) all-purpose flour
- 1 1/2 cups (300g) granulated sugar
- 1 teaspoon baking soda
- 1 teaspoon salt
- 1 teaspoon cocoa powder
- 1 1/2 cups (360ml) buttermilk
- 2 large eggs
- 1 1/2 cups (360ml) vegetable oil
- 1 teaspoon vanilla extract
- 1 teaspoon white vinegar
- 1 tablespoon red food coloring
For the Oreo Frosting:
- 1 1/2 cups (340g) unsalted butter, softened
- 4 cups (500g) powdered sugar
- 1/2 cup (120ml) heavy cream
- 1 teaspoon vanilla extract
- 1 cup (100g) crushed Oreos
For Garnish:
- Whole Oreos for decoration
- Crumbled Oreos for sprinkling
3. Directions
- Prepare the cake batter: Preheat your oven to 350°F (175°C). Grease and flour two 9-inch round cake pans. In a large bowl, sift together the flour, sugar, baking soda, salt, and cocoa powder. In another bowl, whisk together the buttermilk, eggs, oil, vanilla extract, vinegar, and food coloring. Gradually add the wet ingredients to the dry ingredients, mixing until smooth.
- Bake the cakes: Divide the batter evenly between the prepared pans. Bake for 25-30 minutes or until a toothpick inserted into the center comes out clean. Cool the cakes in the pans for 10 minutes, then transfer them to a wire rack to cool completely.
- Make the Oreo frosting: Beat the softened butter in a large bowl until creamy. Gradually add the powdered sugar, heavy cream, and vanilla extract, mixing until light and fluffy. Fold in the crushed Oreos.
- Assemble the cake: Place one cake layer on a serving plate and spread a generous layer of Oreo frosting on top. Place the second cake layer on top and frost the top and sides of the cake evenly.
- Decorate: Garnish the cake with whole Oreos and sprinkle crumbled Oreos around the edges.
- Chill and serve: Refrigerate the cake for at least 30 minutes before slicing to allow the frosting to set.
4. How to Prepare
To ensure a perfectly moist cake, don’t overmix the batter. The red food coloring gives the cake its signature velvet hue, but you can adjust the amount for a lighter or deeper color. For the frosting, use crushed Oreos with the cream filling to enhance the flavor and texture. Chilling the cake before serving ensures clean slices and a professional finish.
5. Preparation Time
- Preparation time: 20 minutes
- Baking time: 30 minutes
- Cooling and decorating time: 1 hour
- Total time: 1 hour 50 minutes
6. Servings
This recipe makes approximately 12 servings.
7. FAQs
Q1. Can I use store-bought frosting?
Yes, but homemade Oreo frosting gives the cake a fresher and creamier flavor.
Q2. Can I make the cake layers ahead of time?
Absolutely! Bake the layers up to 2 days in advance and store them tightly wrapped at room temperature.
Q3. Can I substitute buttermilk?
Yes, mix 1 tablespoon of white vinegar or lemon juice with 1 cup of milk and let it sit for 5 minutes as a substitute.
Q4. Can I make this cake without red food coloring?
Of course! The flavor won’t change, and you’ll have a vanilla-Oreo cake instead.
Q5. How do I store leftovers?
Cover the cake tightly and refrigerate for up to 5 days. Bring it to room temperature before serving.
8. Conclusion
Velvet and Oreo Cake is a dessert that combines rich, moist cake layers with the creamy, cookie-filled goodness of Oreo frosting. It’s an eye-catching and mouthwatering treat that’s surprisingly easy to make. Whether you’re celebrating a special occasion or indulging in a sweet craving, this recipe is guaranteed to be a hit. Try it today and delight your taste buds with this decadent fusion of flavors. Bon appétit!